Guide: Multi-Arc Solution of LLM Inference based Arc Pro B60
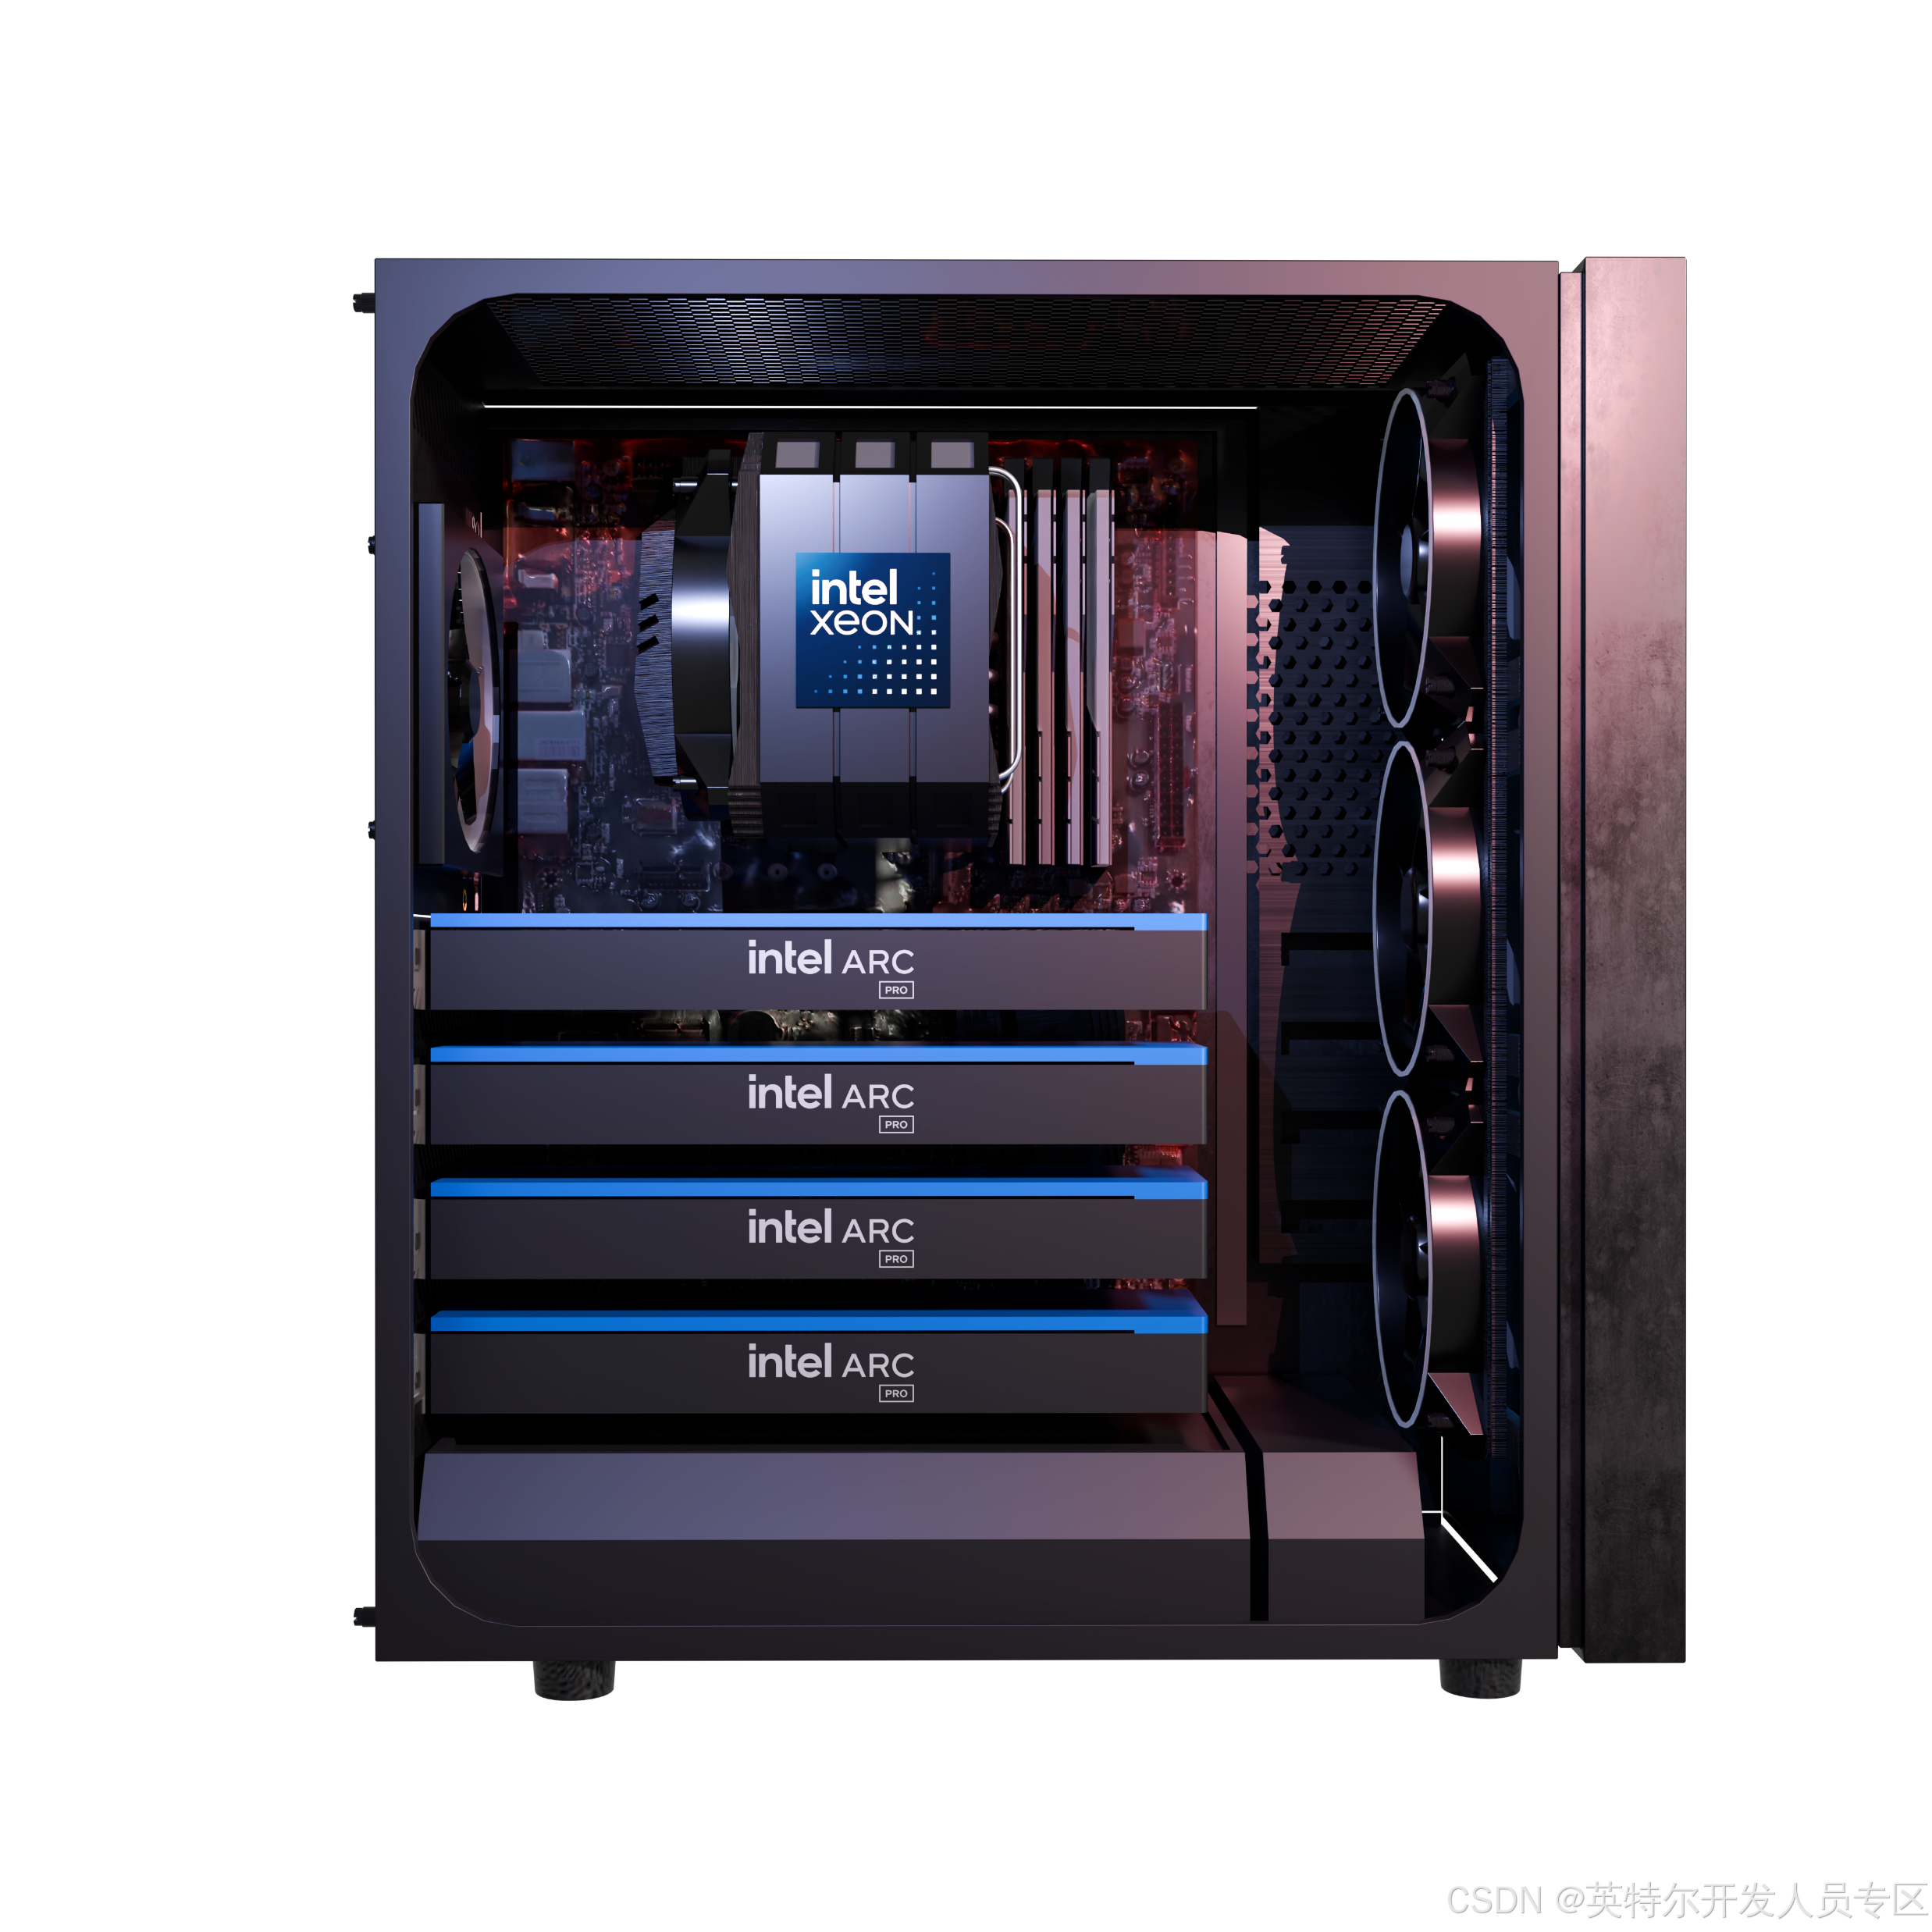
1.1 Xeon Platform with multi-arc Pro B60
Xeon platform with 2x, 4x or 8x Arc Pro B60, and setup power for each GPU.
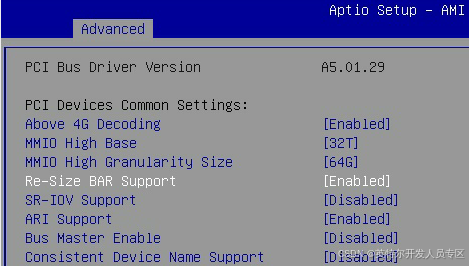
1.2 Set BIOS option
Enable Re-Size BAR Support and PCIe Gen5 X8X8 as below:
Socket Configuration->IIO Configuration->Socket1 Configuration
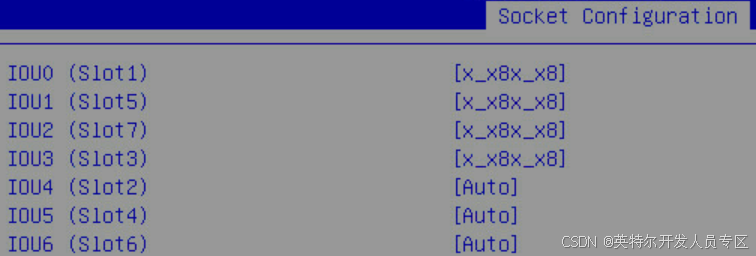
If you have a dual-core GPU, this setting is mandatory.
Socket Configuration->IIO Configuration->Intel VT for Directed I/O(VT-d)
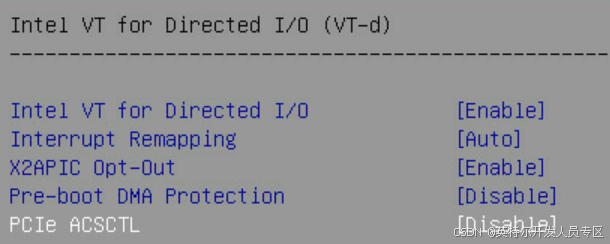
Mark: This option is related to P2P communication, must be disabled.
2. SW Installation & Configuration
Software configuration is as follows:
|
SW Configuration |
|
|
OS |
Ubuntu 25.04 |
|
Kernel |
6.14.0-1011-intel |
|
Driver |
multi-arc-bmg-offline-installer-26.5.6.1 |
|
vLLM Serving |
intel/llm-scaler-vllm:1.3 |
2.1 OS Installation
Install Ubuntu 25.04 according to the URL:
Ubuntu25.04-desktop:
https://releases.ubuntu.com/25.04/ubuntu-25.04-desktop-amd64.iso
Mark: if you install desktop OS, you must unplug GPU power cable. After the installation of driver is complete, then connect the power cord.
Ubuntu25.04-server(Normal install)
https://mirrors.xjtu.edu.cn/ubuntu-releases/25.04/ubuntu-25.04-live-server-amd64.iso
2.2 HW Verification
Keep power is enough for multi-GPUs and install Arc Pro B60 in platform, then check PCIe status:
~$ lspci | grep e211
18:00.0 VGA compatible controller: Intel Corporation Device e211
36:00.0 VGA compatible controller: Intel Corporation Device e211
54:00.0 VGA compatible controller: Intel Corporation Device e211
cc:00.0 VGA compatible controller: Intel Corporation Device e211
2.3 Driver Offline Installation
Download offline driver from this URL:
Let’s use Ubuntu 25.04-Desktop as an example for the installation.
Make sure APT network is connected and your account has sudo permissions, install driver as below:
~$ wget https://cdrdv2.intel.com/v1/dl/getContent/873591/873592?filename=multi-arc-bmg-offline-installer-26.5.6.1.tar.xz -O multi-arc-bmg-offline-installer-26.5.6.1.tar.xzInstall offline driver as below:
~$ xz -d multi-arc-bmg-offline-installer-26.5.6.1.tar.xz
~$ tar -xvf multi-arc-bmg-offline-installer-26.5.6.1.tar
~$ cd multi-arc-bmg-offline-installer-26.5.6.1
If you perform an upgrade installation (Option)
~$ sudo apt --fix-broken install
~$ sudo apt autoremove
Install driver by default.
~$ sudo ./installer.shWait a few seconds, you can see the success log as below:
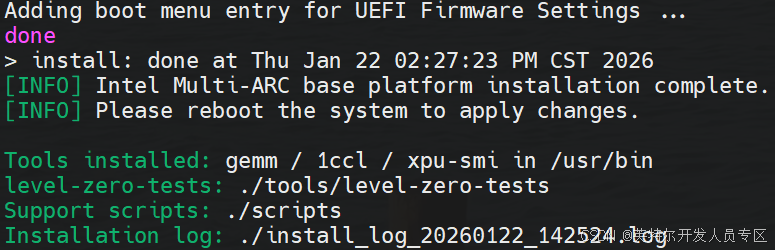
~$ sudo reboot
~$ uname -r
6.14.0-1011-intel
Fixed Kernel as below:
~$ sudo apt-mark hold linux-image-generic linux-headers-genericDisable software update by modifying configuration APT::Periodic::Update-Package-Lists from "1" to "0":
~$ sudo vim /etc/apt/apt.conf.d/10periodic
Add current user into render group as below:
~$ sudo gpasswd -a ${USER} render
~$ sudo newgrp render
~$ sudo reboot
Verify GPU status:
~$ xpu-smi discovery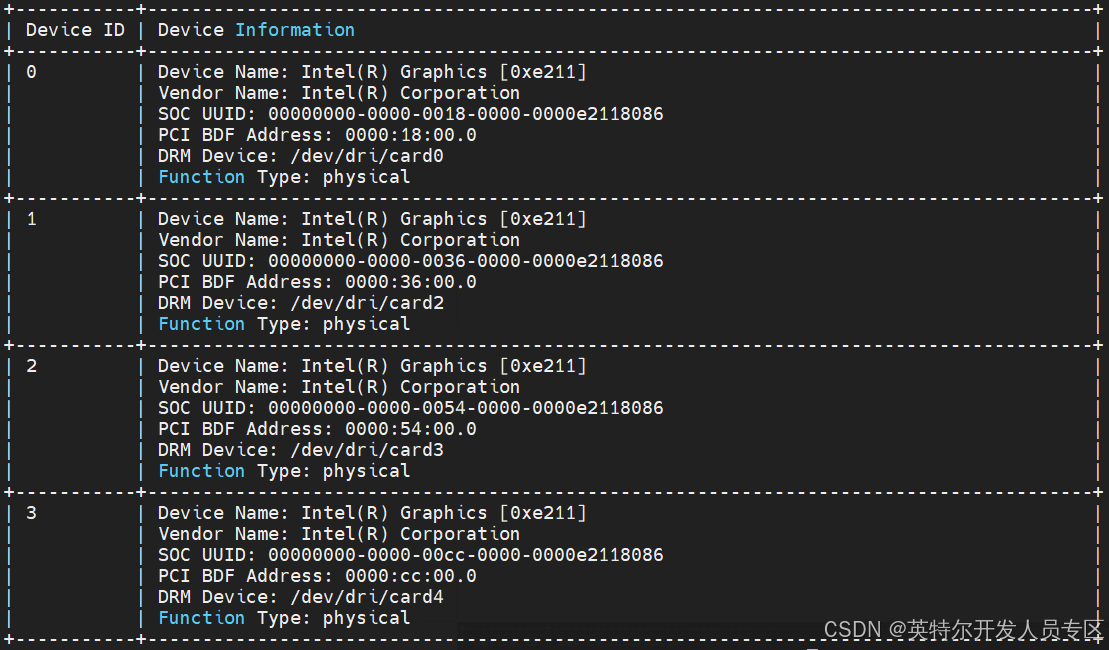
View driver version as below:
~$ source /opt/intel/oneapi/setvars.sh
~$ sycl-ls
2.4 System Mode Setting (Optional)
If you install desktop system, you must set system to graphical mode.
~$ sudo systemctl get-defaultIf return multi-user.target, you can change it to graphical mode.
~$ sudo systemctl set-default graphical.target3. Platform Verification & Benchmark
Benchmark memory bandwidth, host to GPU bandwidth, allreduce etc.
Lock CPU and GPU’s frequency firstly:
~$ cd multi-arc-bmg-offline-installer-26.5.6.1
~$ sudo bash ./scripts/evaluation/setup_perf.sh
3.1 Platform Configuration Verification
Verify the platform configuration as below command:
~$ cd multi-arc-bmg-offline-installer-26.5.6.1
~$ sudo bash scripts/evaluation/platform_basic_evaluation.sh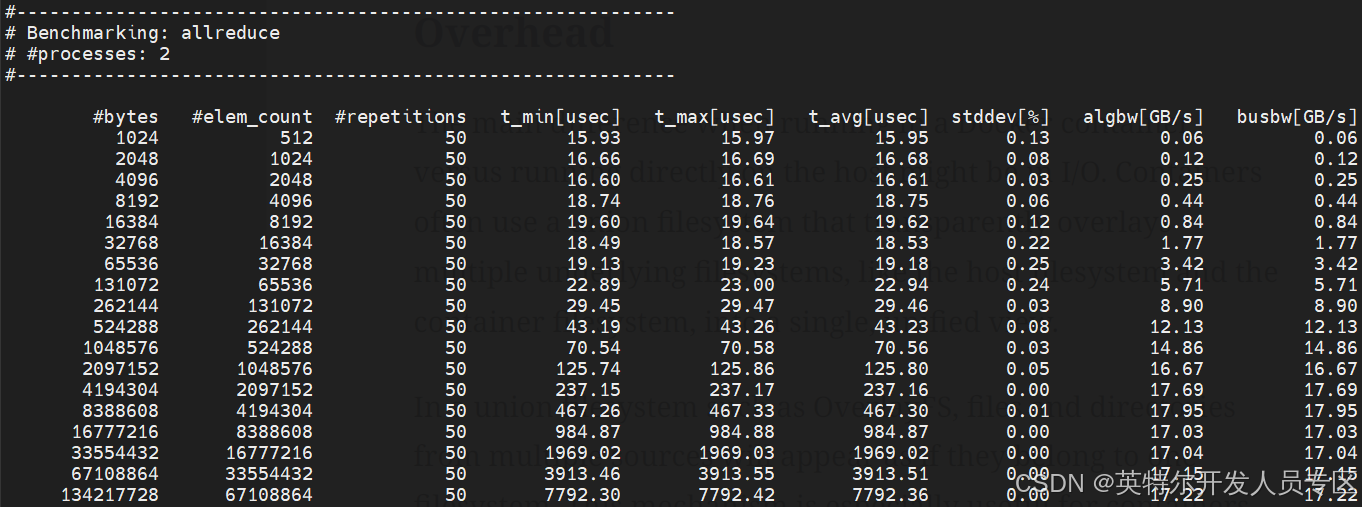
Wait several minutes, log file will be generated such as results/*/benchmark_detail_log.txt
3.2 Memory Bandwidth test
Test GPU’s bandwidth as below:
~$ export NEOReadDebugKeys=1
~$ export RenderCompressedBuffersEnabled=0
~$ xpu-smi diag --singletest 3
3.3 benchmark bandwidth between Host and GPU
Test GPU 0 bandwidth between host and GPU:
~$ cd multi-arc-bmg-offline-installer-26.5.6.1/tools/level-zero-tests
~$ sudo ./ze_peak -t transfer_bw -d 0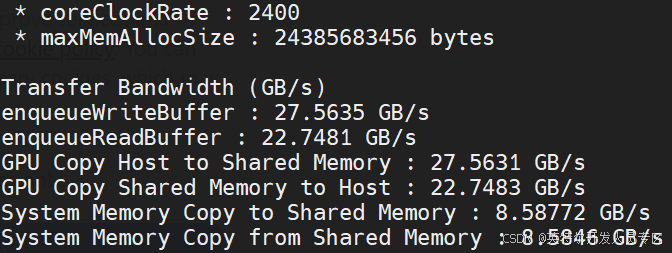
3.4 Benchmark CCL Bandwidth
Test the P2P performance between two CPUs.
~$ cd multi-arc-bmg-offline-installer-26.5.6.1/tools/level-zero-testsTest Unidirectional communication P2P performance:
~$ sudo ./ze_peer -t transfer_bw -o write --parallel_pair_targets 0:1
Test bidirectional communication P2P performance:
~$ sudo ./ze_peer -t transfer_bw -o write --parallel_pair_targets 0:1 -b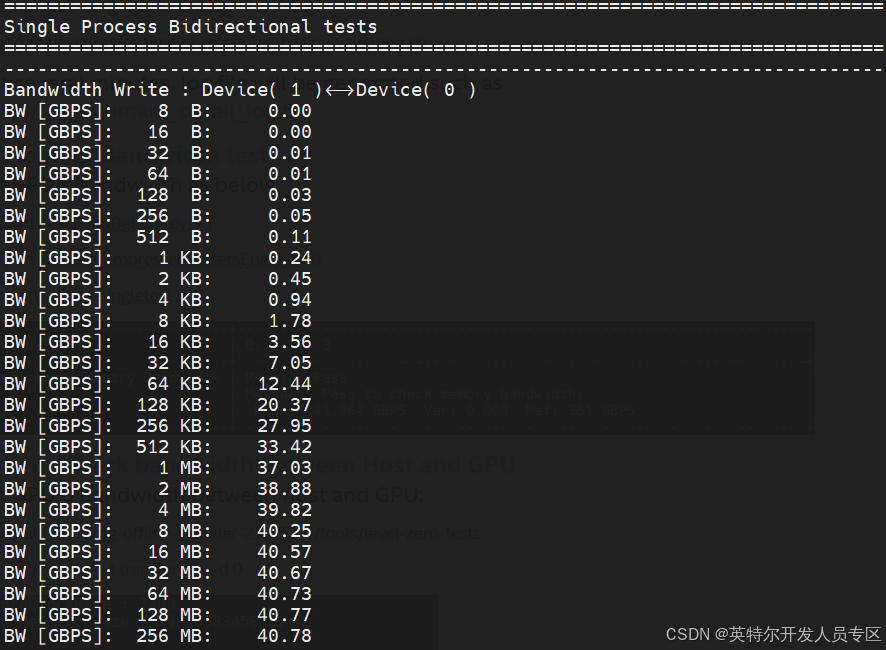
4. GPU Visualization
4.1 GPU Isolation for Container
This is a common requirement for virtualization orchestration, we need isolate some GPUs for containers, GPU isolation can be achieved in the following ways:
1. Remove --privileged and --device=/dev/dri
2. Add the following options
--device /dev/dri/renderD128:/dev/dri/renderD128 \
 --mount type=bind,source="/dev/dri/by-path/pci-0000:18:00.0-card",target="/dev/dri/by-path/pci-0000:18:00.0-card" \
 --mount type=bind,source="/dev/dri/by-path/pci-0000:18:00.0-render",target="/dev/dri/by-path/pci-0000:18:00.0-render" \
 -v /dev/dri/card0:/dev/dri/card0 \
Based above method, GPU0 can be bound to a container, Ensure the PCIe ID of this device is aligned correctly (Marked in orange).
5. LLM Serving & Benchmark
Install docker refers to link Install Docker Engine on Ubuntu | Docker Docs
For detailed installation instructions, please refer to Section 6.1
5.1 Download Docker Image & LLM Models
Download intel vllm version as below:
~$ docker pull intel/llm-scaler-vllm:1.2Download LLM model from https://hf-mirror.com in your folder (for example: /home/${USER}/LLM):
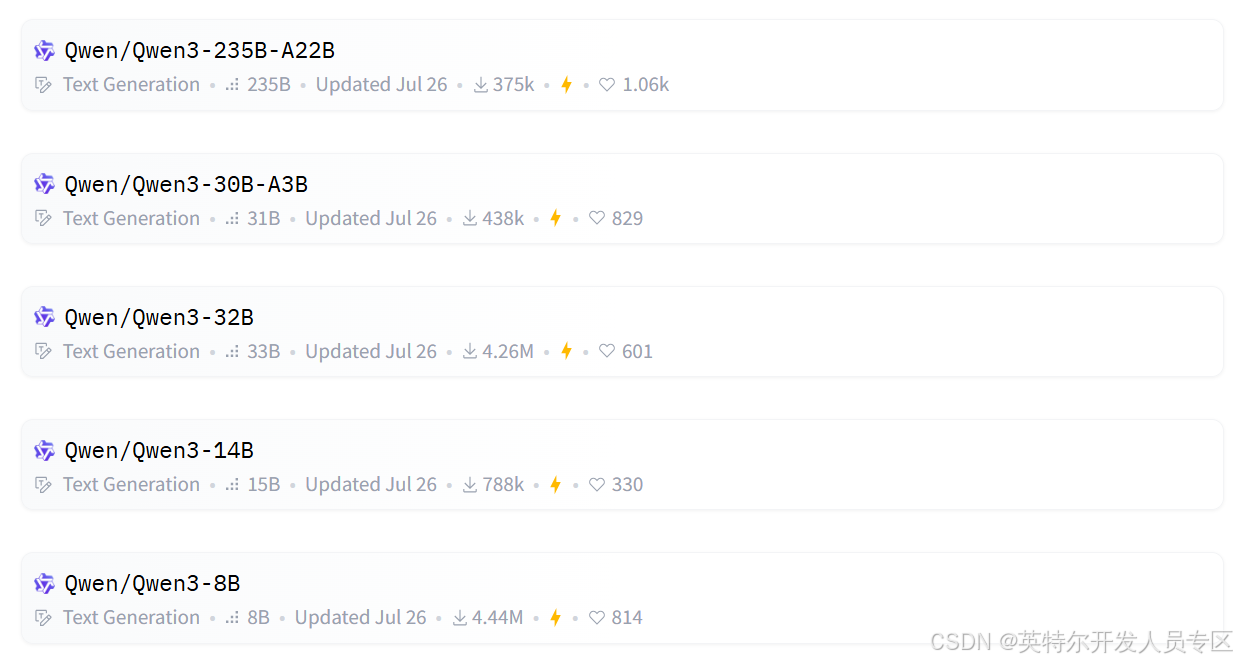
Download distilled model from https://hf-mirror.com/collections/Qwen/qwen3
5.2 Text Generation LLM Serving
Put below script into docker-backend.sh in /home/user/llm-server:
#!/bin/bash
export DOCKER_IMAGE=intel/llm-scaler-vllm:1.3
export CONTAINER_NAME=llm-serving
docker rm -f $CONTAINER_NAME
sudo docker run -td \
    --privileged \
    --net=host \
    --device=/dev/dri \
    --name=$CONTAINER_NAME \
    -v /home/user/LLM:/llm/models/ \
    -v /home/user/llm-server:/llm/ \
    -e no_proxy=localhost,127.0.0.1 \
    --shm-size="32g" \
    --entrypoint /bin/bash \
    $DOCKER_IMAGE
Put below script into vllm-qwen3-32b-openaikey.sh:
#!/bin/bash
model="/llm/models/Qwen3-32B"
served_model_name="Qwen3-32B"

export TORCH_LLM_ALLREDUCE=1
export VLLM_USE_V1=1
export CCL_ZE_IPC_EXCHANGE=pidfd
export VLLM_ALLOW_LONG_MAX_MODEL_LEN=1
export VLLM_WORKER_MULTIPROC_METHOD=spawn

python3 -m vllm.entrypoints.openai.api_server \
       --model $model \
       --served-model-name $served_model_name \
       --dtype=float16 \
       --enforce-eager \
       --port 8001 \
       --host 0.0.0.0 \
       --api-key intel123 \
       --trust-remote-code \
       --disable-sliding-window \
       --gpu-memory-util=0.9 \
       --max-num-batched-tokens=10000 \
       --disable-log-requests \
       --max-model-len=10000 \
       --block-size 64 \
       --quantization fp8 \
       -tp=4
Then start the container and vllm serving:
~$ sudo bash docker-backend.sh
~$ docker exec -it llm-serving bash
~$ bash vllm-qwen3-32b-openaikey.sh
When you see log as below, the service is successful:

Verify LLM serving by command as below script test.sh:
#!/bin/bash
if [ $# -eq 3 ]; then
    MODEL=$1
    API_KEY=$2
    PROMPT=$3
else
    echo "Please add input parameters"
    echo "bash bash.sh Qwen3-32B api_key input_prompt"
    exit
fi
echo "Prompt: "$PROMPT
# 流式对话函数
stream_chat() {
  local model="$1"
  local api_key="$2"
  local prompt="$3"
  curl -s -X POST  http://localhost:8001/v1/chat/completions -H "Content-Type: application/json" \
          -H "Authorization: Bearer '"$api_key"'" \
          -N \
          -d '{
            "model": "'"$model"'",
            "messages": [{"role": "user", "content": "'"$prompt"'"}],
            "temperature": 0.7,
            "max_tokens": 512,
            "stream": true}' | while IFS= read -r line; do

            if [[ $line == data:* ]]; then
                local json="${line:6}"
                [ "$json" == "[DONE]" ] && break
                local content=$(echo "$json" | jq -r '.choices[0].delta.content // empty')
                if [ -n "$content" ]; then
                    printf "%s" "$content"
                    sleep 0.02
                fi
            fi
          done
          echo
}

stream_chat $MODEL $API_KEY $PROMPT
execute this shell script as below:
~$ bash test.sh Qwen3-32B intel123 "写一段关于人工智能的科普短文"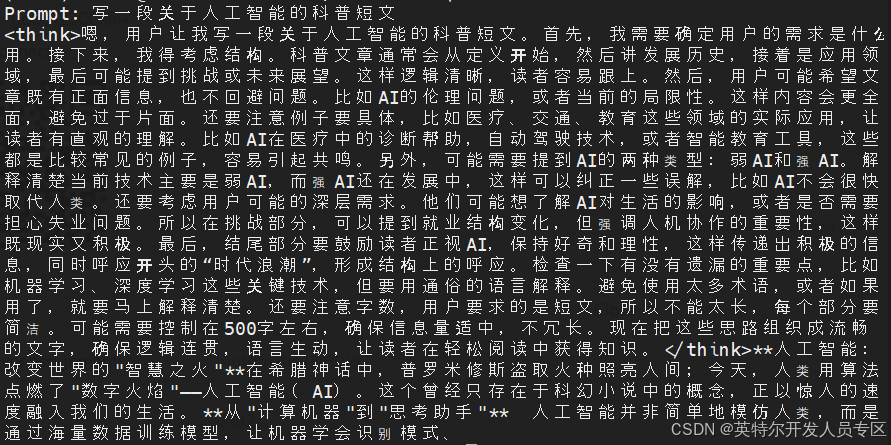
5.3 Multimodal LLM Serving
Download Qwen2.5-VL-32B-Instruct from Huggingface.
Put below script into vllm-qwen2.5-vl-32b-instruct-openaikey.sh:
#!/bin/bash
model="/llm/models/Qwen2.5-VL-32B-Inastruct"
served_model_name="Qwen2.5-VL-32B-Inastruct"

export TORCH_LLM_ALLREDUCE=1
export VLLM_USE_V1=1
export CCL_ZE_IPC_EXCHANGE=pidfd
export VLLM_ALLOW_LONG_MAX_MODEL_LEN=1
export VLLM_WORKER_MULTIPROC_METHOD=spawn
python3 -m vllm.entrypoints.openai.api_server \
             --model $model \
             --served-model-name $served_model_name \
             --allowed-local-media-path /llm/models/test \
             --dtype=float16 \
             --enforce-eager \
             --port 8001 \
             --host 0.0.0.0 \
             --api-key intel123 \
             --trust-remote-code \
             --gpu-memory-util=0.9 \
             --max-num-batched-tokens=8192 \
             --disable-log-requests \
             --max-model-len=8192 \
             --block-size 64 \
             --quantization fp8 \
             -tp=4
Then start the container and vllm serving:
~$ sudo bash docker-backend.sh
~$ docker exec -it llm-serving bash
~$ bash vllm-qwen2.5-vl-32b-instruct-openaikey.sh
When you see log as below, the service is successful:

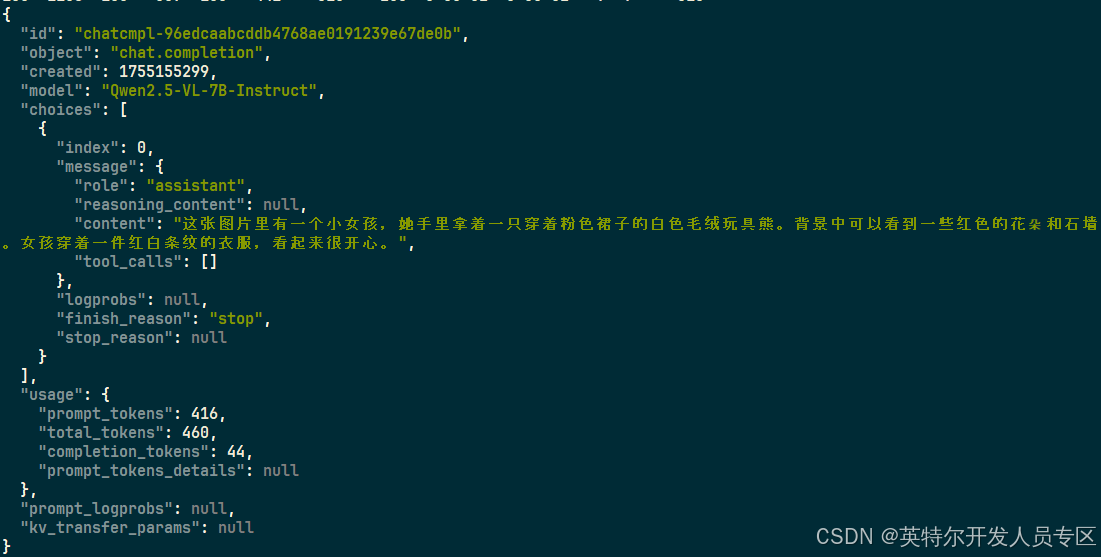
Verify LLM serving by command as below:
~$ curl http://localhost:8001/v1/chat/completions \
-H "Content-Type: application/json" \
-H "Authorization: Bearer intel123" \
    -d '{
        "model": "Qwen2.5-VL-32B-Instruct",
        "messages": [
        {
            "role": "user",
            "content": [
            {
                "type": "text",
                "text": "图片里有什么?"
            },
            {
                "type": "image_url",
                "image_url": {
                    "url": "http://farm6.staticflickr.com/5268/5602445367_3504763978_z.jpg"
                    }
                }
                ]
            }
            ],
            "max_tokens": 128
  }'
Output is as below:
6. Appendix
6.1 Docker Installation
Install docker refers to link Install Docker Engine on Ubuntu | Docker Docs
~$ sudo apt update
~$ sudo apt install ca-certificates curl
~$ sudo install -m 0755 -d /etc/apt/keyrings
~$ sudo curl -fsSL https://download.docker.com/linux/ubuntu/gpg -o /etc/apt/keyrings/docker.asc
~$ sudo chmod a+r /etc/apt/keyrings/docker.asc
# Add the repository to Apt sources:
~$ sudo tee /etc/apt/sources.list.d/docker.sources <<EOF
Types: deb
URIs: https://download.docker.com/linux/ubuntu
Suites: $(. /etc/os-release && echo "${UBUNTU_CODENAME:-$VERSION_CODENAME}")
Components: stable
Signed-By: /etc/apt/keyrings/docker.asc
EOF
~$ sudo apt update
~$ sudo apt install docker-ce docker-ce-cli containerd.io docker-buildx-plugin docker-compose-plugin
Add user account into docker group:
~$ sudo gpasswd -a ${USER} docker
~$ sudo newgrp docker6.2 KVM Installation
The working principle of KVM is as follows:
Physical GPU → VFIO Driver (Host)→ Passthrough → Virtual Machine → GPU Driver
Mark: Host platform does not require driver installation beforehand.
BIOS configuration is as below:
- Set BIOS Configuration to enable virtualization in BIOS:
Socket Configuration -> Processor Configuration-> VMX = Enabled
- Configure kernel command-line parameters by adding “iommu=pt intel_iommu=on” to line GRUB_CMDLINE_LINUX_DEFAULT as below:
~$ sudo vim /etc/default/grub

If you use graphical mode, please modify graphics.cfg as below:
~$ sudo vim /etc/default/grub.d/graphics.cfgGRUB_CMDLINE_LINUX_DEFAULT="$GRUB_CMDLINE_LINUX_DEFAULT iommu=pt intel_iommu=on"
Then reboot the OS to take effect.
~$ sudo update-grub
~$ sudo reboot
~$ sudo dmesg | grep -i iommu
Install KVM package as below:
~$ sudo apt update
~$ sudo apt install -y qemu-kvm libvirt-daemon-system libvirt-clients bridge-utils virt-manager ovmf
~$ sudo apt install -y cpu-checker
# Add user into group
~$ sudo adduser $USER libvirt
~$ sudo adduser $USER kvm
~$ kvm-okINFO: /dev/kvm exists
KVM acceleration can be used
Then leverage virt-install and virsh to install and manage virtual machines.
OpenVINO 小助手微信 : OpenVINO-China
如需咨询或交流相关信息,欢迎添加OpenVINO小助手微信,加入专属社群,与技术专家实时沟通互动。

为开发者提供丰富的英特尔开发套件资源、创新技术、解决方案与行业活动。欢迎关注!
更多推荐


 20
20 0
0- 0


 已为社区贡献327条内容

所有评论(0)